iPhone photo tips can help you create more appealing images. One simple trick is to use the rule of thirds. This composition principle divides the image field into three thirds and places the main subjects along the grid lines. To make use of this rule, you can turn on the grid lines in the camera settings. You can also use straight, long lines as your leading lines. The leading lines guide the viewer through an image. This technique is best used with multiple subjects to get the best results.
Camera app zoom
The iPhone 8 Plus, and later models, will allow you to manually adjust your zoom. The camera app has a zoom wheel, but it doesn't show the focal length of any of the lenses. Instead, it displays dots that show the focal length. This same technique is applicable to the Max Plus and Max models. This trick can be used if you know how to zoom into the photo with the camera app.
Burst mode
You may be wondering how to activate burst mode while taking photos with your iPhone. You can use it the same as the shutter button, except that instead of taking a lot of photos, your phone takes one large, clear photo. After the burst is over, you can swipe through all the photos to locate your favorites and save them. Don't forget to save your favorites! Burst mode photos can be just as great as those you take with the regular shutter button.
Compositional grid
You should activate the compositional Grid when you take a photo using your iPhone. This tool allows you to see how your composition affects the overall composition of your photo. The grid makes it easier to see the lines and places your subject in close proximity. It is easier to create eye-catching photos if you don't place the subject in the middle. By using a compositional map, your photo will appear more balanced.
HDR mode
Using HDR mode on your iPhone is an excellent way to avoid backlight and bleak foreground areas in your photographs. You can achieve this manually by darkening and brightening the background, as well as capturing HDR photos. You can also set your iPhone to auto mode to automatically capture HDR images. Once the effect has taken effect, you can turn on the HDR feature and wait for it to happen. The HDR mode requires three shots at different exposures to produce a high quality image. It takes slightly longer to capture an iPhone photo than a normal shot.
Cropping
Cropping iPhone photos can result in a new composition. Although you might not have paid much attention to the background when taking the original photo, cropping later will remove all those extra elements. Cropping can give you a second chance at getting the composition right. Cropping gives you the opportunity to create a more interesting image. Here are some examples on how to crop iPhone photos for unique compositions.
Editing
Editing iPhone photos can be difficult, especially if your are new to the world of photography. This article will walk you through the steps of editing three types of edits: selective light, color adjustments, or special effects. After you have mastered the basics of editing, you will be able to create your own iPhone photo editing workflows. Follow these steps to create stunning iPhone photos that won't cost a lot.
Time-lapse photography
It's easy to take time-lapse photos using your iPhone. You will need patience, a tripod, and an angle that is suitable for your subject. Here are some tips. Be sure to fully charge your phone before you start shooting. Once you are comfortable with the process, it is very easy to create time-lapse photographs.
FAQ
What Camera Should I Get
It all depends on your goals and what type of photographer you are. If you're just getting started, a basic point and click camera will suffice.
But once you are comfortable with the basics, you will probably need more. It all comes down to personal preference.
Before you buy a camera, here are some points to remember.
-
Features: What features do you need? Will you use manual settings or autofocus? How many megapixels is your camera capable of? Is there one?
-
Price: How much do you want to spend? Are you planning to upgrade your camera every year or two?
-
Brand: Do you feel satisfied with the brand you choose? You shouldn't settle for less.
-
Functionality: Can you use your camera in low light situations? Can you take high-resolution photos?
-
Image Quality - How clear and sharp is your image quality?
-
Battery Life: How much time will your camera last without needing to be recharged?
-
Accessories: Do you have the ability to attach flashes, additional lenses, and so forth? ?
How can I make my photos look beautiful?
The best way to ensure you look good in photos is to take them yourself. Learn how to pose and what angles look best. You'll also learn how to use lighting and props to enhance your natural beauty.
You will learn how to choose clothes that fit, make-up that suits you, and hairstyles and styles that work for your face.
If you are not happy with your results, we will show you how you can retouch them using Photoshop and other editing tools.
Don't be afraid to take some self-portraits.
How can I become a professional photographer?
Photography is an art form that requires patience, dedication, passion and dedication. Photography is a passion. You will be able to do much more than if your goal was to make a buck.
It is important to know how to properly use your camera. You need to be able to comprehend composition, lighting, exposure, depth-of-field, and other aspects of photography. A basic understanding of Photoshop is essential.
It is hard to master photography, but it is worth the effort.
If you want to improve your skills, then read books on the subject, attend classes and take part in competitions. This will give you experience and confidence that will help you improve. What equipment do you need?
It really depends on what kind of photography you like to do. For example, if you are interested in landscape photography, you will need a wide-angle lens.
If you are into portrait photography, you must invest in a telephoto lens.
A tripod is essential when taking photographs. It allows you to stand back and compose your picture without moving around.
A camera bag can be used to carry your camera, memory cards, or other accessories.
If you're using a compact camcorder, a flash device is essential.
A DSLR (Digital Single Lens Reflex), camera is the best choice for novice photographers who wish to create professional-quality images.
DSLRs are great because they let you control every aspect in your photo including shutter speed (aperture, ISO sensitivity), white balance, focus and white balance. They also provide a range of features such as autofocus, auto-exposure lock, self-timer, bracketing, and RAW format.
What Lenses Should I Use
The most common question beginners ask is, "what lens should I buy?" The choice is difficult because of the many options.
The good news is that you don't necessarily need to buy a new lens every time you purchase a new camera. You can always add lenses later.
There are three types possible lenses.
-
Wide Angle Lens (14mm - 24mm): These lenses give you a wide angle of view, allowing you to capture more of your subject. You can zoom in and not lose image quality.
-
Standard/Normal Zoom Lens (28mm-70mm): These lenses let you change the focal length while still maintaining excellent image quality.
-
Telephoto Zoom Lens (70mm-200mm): These lenses can be used to capture distant subjects. These lenses allow you to focus on your subject, even though they may appear small in the frame.
Combining lenses can create different effects. One example is to use a regular lens to photograph close-up details and then switch to a long-range lens to capture faraway objects.
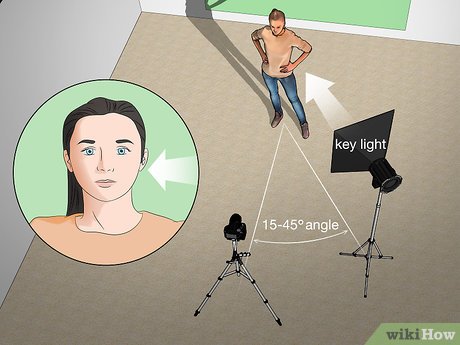
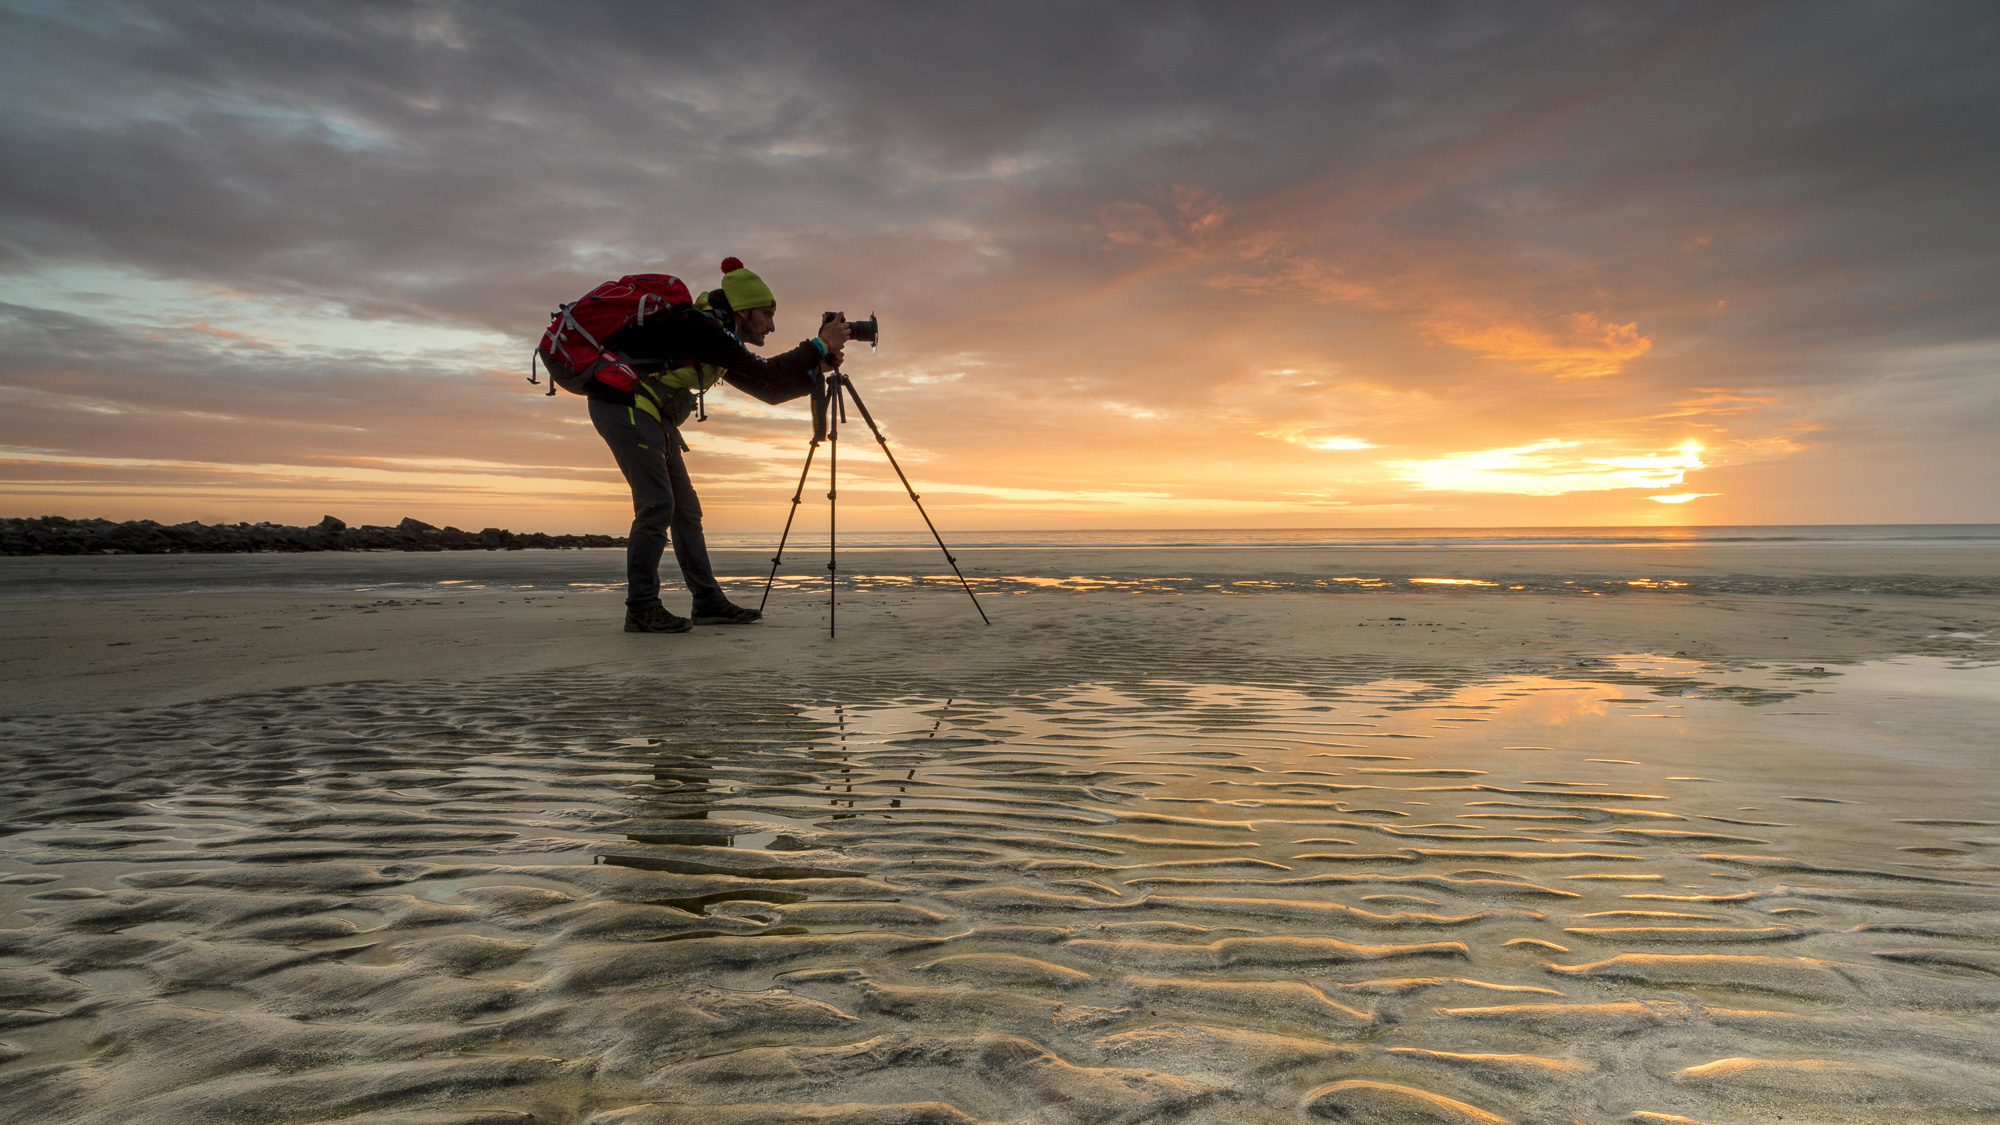
Do I Need A Tripod?
This is one question that everyone wants to know. While a tripod isn’t necessary every time, it is useful.
A tripod allows you to stabilize your camera when taking photos at slow shutter speeds. Tripods can be a huge help when you are shooting landscapes or stationary subjects.
However, using a tripod to photograph moving subjects like people or sports can result in blurriness. So, how do you know which situations require a tripod?
A tripod is an essential tool for photographing fast-moving subjects or stationary objects. Examples include:
-
Sports
-
People
-
Landscapes
-
Close-ups
-
Macro shots
This test will help you determine if you need a tripod. Hold your camera still and look through the viewfinder. If blurred lines appear or you feel movement, you will definitely need a tripod.
A tripod won't make any difference if there is no blurring.
These tips will help you make the right decision about whether to invest in a tripod.
-
Your tripod should have smooth legs. This helps prevent vibrations that could shake your camera.
-
Use a sturdy tripod. Some tripods may be made from plastic, which can make them less durable. Opt for a sturdy metal tripod.
-
You may want to consider buying a remote-control device. You can control your camera remotely with this remote release. It can automatically fire the shutter when you press the button.
-
You should look for a tripod with 360 degree rotation. This makes it easier to position your camera vertically or horizontally.
-
Be aware that tripods are not cheap. Expect to pay between $100-200. You will still get a lot out of your money.
-
Don't forget accessories such as memory cards or filters.
-
Before shopping online, be sure to visit your local shop. Many retailers offer free shipping.
-
Read reviews to determine what customers think about a particular product.
-
Ask family members or friends to share similar products.
-
For customer feedback, visit message boards and forums.
-
Find user reviews online.
-
Use websites like Amazon.com to compare prices and read customer feedback.
-
View photo galleries to see the different uses of tripods by photographers.
Statistics
- There are people out there who will pick at flaws they can only see in 100% crops of your photos. (wikihow.com)
- By March 2014, about 3 million were purchased monthly, about 30 percent of the peak sales total. (en.wikipedia.org)
- In this case, 100% of readers who voted found the article helpful, earning it our reader-approved status. (wikihow.com)
- While I cannot prove that all of those spots were not sensor dust, the photo was taken during a heavy snowstorm…so I guess that 99.8% of the spots are snowflakes. (bhphotovideo.com)
External Links
How To
How to photograph in low light conditions
Low-light Photography is when you take photos in dimly lit or dark environments. It requires special equipment. The main challenges include controlling exposure, white balance, and sharpness. There are two kinds of low light photography. Flash photography is best when there is enough light. But if there isn't enough natural light, then you'll have to use a flash. For example, if your subject is indoors but outside, there might not be enough light to capture a good picture without a flash. Shooting at night in the moonlight hours is a good alternative to using a flash. This will give you some beautiful shadows and colors. Another option to consider is shooting during twilight. Twilight happens when the sun has set but there is still daylight.
You may also want to experiment with long exposures. Long exposures allow you to record images after the shutter has been open for several minutes. If the shutter is closed, the camera records only the light that falls onto the sensor. This light will continue to fall onto your sensor after a long exposure. The shutter is still closed so no light can enter the lens. Therefore, there is very little movement. Turn off autofocus and autoexposure to ensure you get clear images. You should also adjust the ISO setting prior to you start taking photos. An ISO setting of 200 allows you to adjust how bright or dark the image looks. The shutter button should be pressed quickly when you are ready to take the photo. This will make the shutter close completely. Then, you should hold the shutter button until the last possible second. By holding down the shutter button, you prevent additional light from entering the camera. Once you have taken the image, wait for a few seconds before you release it. This allows the camera to process the image. While the image is processing, you can see your photos on your computer monitor. Once you are satisfied with the photos, save them onto your computer.