Astrophotography is the process of taking pictures of the night sky. Because of its unique properties, it has become more popular. Astrophotography isn't as effective as other forms. However, it will work if you are not in a dark area. We will be discussing the most important equipment and camera techniques. Next, we will discuss light pollution and the best places to take photos.
Cameras
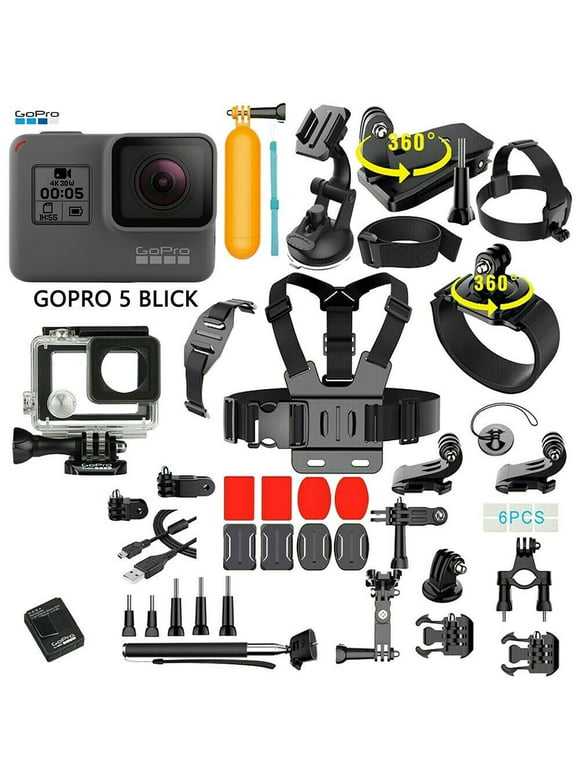
Other than DSLRs, there is a variety of astronomy cameras such as telescopic mountings and astrovideos. The first camera that can be used for astrophotography is the DSLR. They are also relatively affordable. Canon EOS 7D, among other top contenders, is one of these cameras. The 20.2 megapixel sensor can achieve an ISO range up to 102,000. For long exposures, the mount is simple.
Techniques
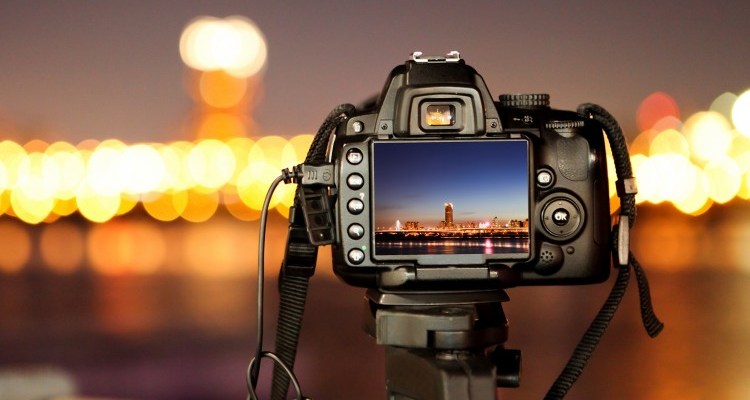
It can be both challenging and rewarding to learn how to take astrophotography photos. Proper equipment, including a tripod, is crucial. To allow remote shutter release, the camera must be set to the Bulb (B), setting. The shorter the exposure, the more important a remote timer release is. Images can be degraded by manual shutter releases, so it is recommended that you use the remote timer when taking astrophotography photos.
Equipment
The most basic equipment for astrophotography is a telescope. While many people start out with a low-cost, basic telescope, it is a good idea that you make sure it works before you spend more money on a higher-end model. Make sure your telescope is compatible with your camera and that the adapter is included. This will make it much easier to mount your camera. You should also be familiar with the ISO system.
Light pollution
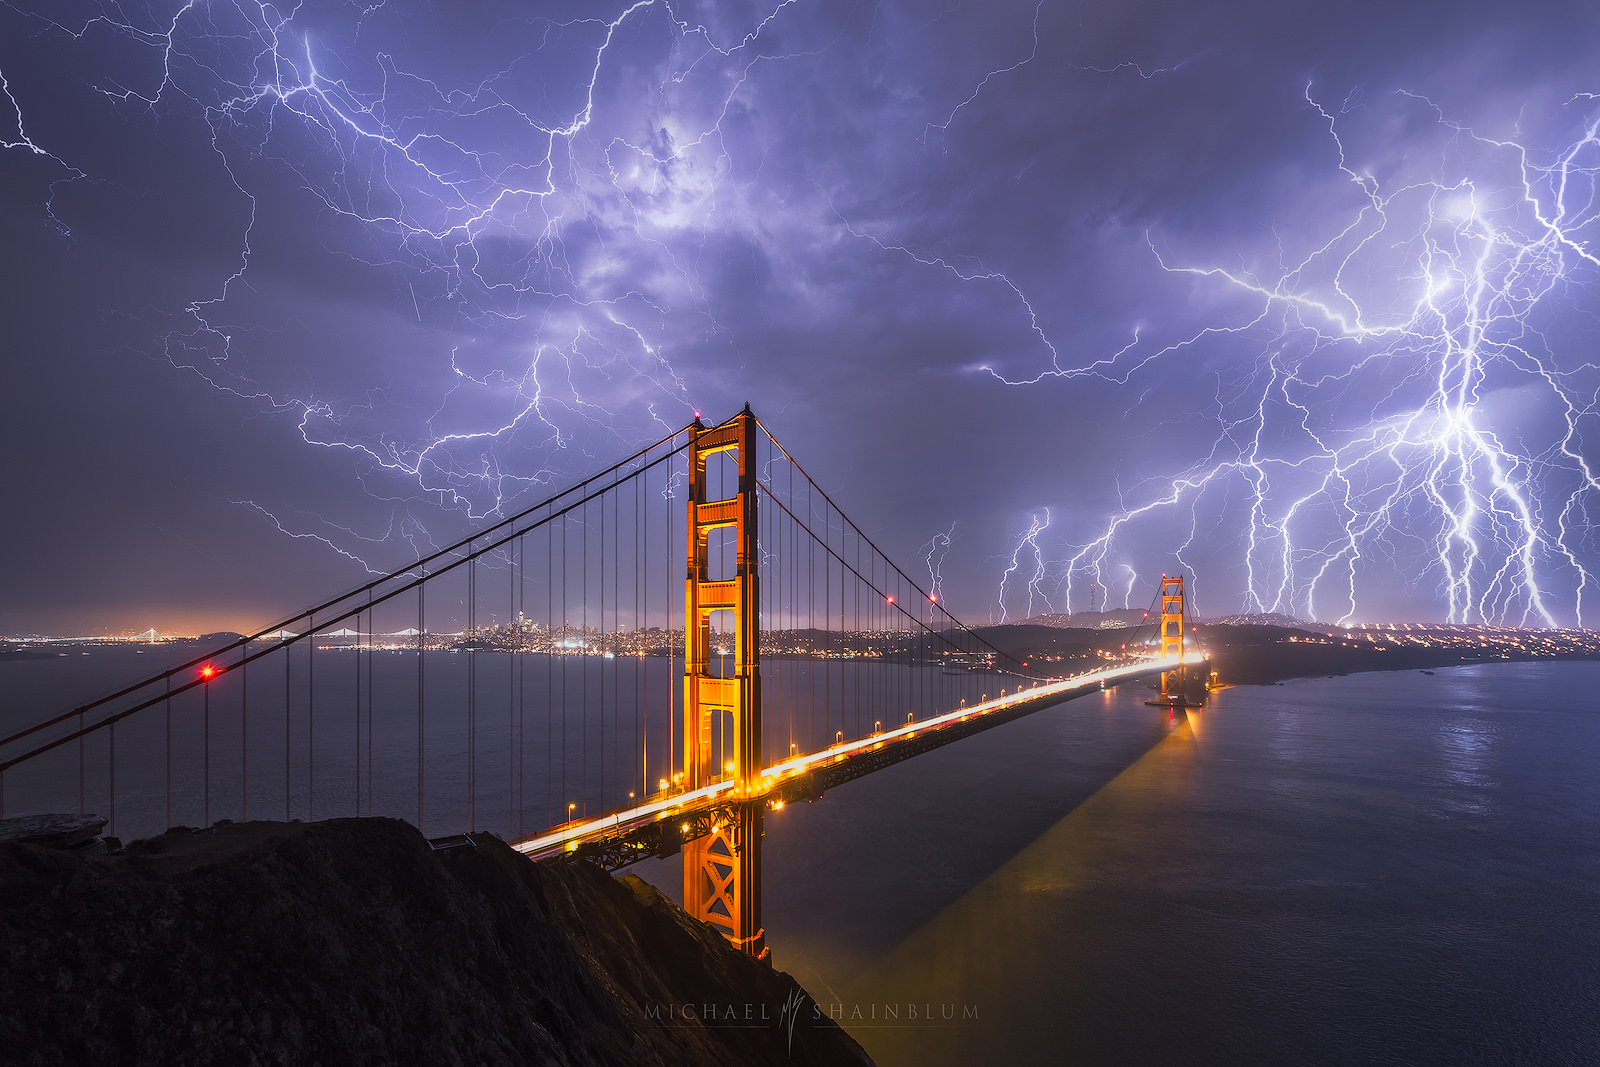
Astrophotography's main problem with light pollution is its effect on astrophotography. Satellites and cities increase the amount artificial light in the night skies, increasing the risk of orbital collisions. There are however ways to reduce light contamination. Here are a few ideas. You can spend more time in darkness at night. The Dark Sky Meter app can be used to measure the sky brightness. Loss of the Night allows users to tag stars and measures sky brightness.
Calibration frames
It is important to use precise calibration frames when shooting astrophotography projects to ensure the best quality images. Light frames can be taken after the lighting has stopped, but they must be captured before the equipment is disassembled. Flat frames taken right after using the lights can cause dust to accumulate and rotation of the camera. A subsequent calibration frame may not fix any issues you experienced while shooting with the lights.
Piggyback method
Piggyback astrophotography uses mounting a camera on a telescope. The telescope serves as a guidescope, allowing the photographer to use a longer focal length and a longer exposure time. Another variation involves attaching a DSLR camera directly to the mount of the telescope. This flexible method allows photographers to use a variety of lenses to create stunning images. Here are some tips on mastering the Piggyback technique of astrophotography.
FAQ
What can I do to learn photography?
There are many methods to learn how you can take amazing photos. You have many options. You could purchase a book or attend a class. Or you could join an online group. If you really want to learn how to take pictures, it's best to do it yourself. That way, you have complete control over what goes into each photo. You'll only get better as long as your learning continues.
The best thing about digital photography? You don't need any expensive equipment. All you need to get started is an internet-connected computer and a digital camera. All else is up to you.
These are some suggestions to help you get started.
-
Learn how to use the manual settings on your camera.
-
Learn the basics of how to use these controls.
-
Take lots of photographs.
-
Edit them.
-
Share them.
-
Keep practicing.
-
Experiment.
-
Try different angles and perspectives.
-
Use light sources creatively.
-
Practice makes perfect.
-
Never be afraid to fail.
-
Be patient.
-
Have fun
Which camera is best for beginners?
The best camera for beginners will depend on your budget, needs and level of skill.
For instance, you could choose a point & shoot digital camera if your goal is to save some money. These cameras aren't as versatile as they look, but they provide good quality.
A DSLR (Digital Single Lens Reflex) camera has interchangeable lenses that let you shoot different types of shots. These are typically more expensive than point-and-shoots, but they provide much greater flexibility.
A beginner's kit for beginners is a good place to start. Everything you will need, including a tripod, flash, memory cards and lens, can be found in one package.
Do not forget to get extra batteries!
Do I Need A Tripod?
This is one of those common questions. A tripod isn’t always needed, but it can be very useful.
This allows you to keep your camera steady even when taking slow shutter speeds. A tripod can be very useful if you want to photograph landscapes and stationary subjects.
A tripod can also cause blurriness when you are photographing people or sports. How can you tell which situations call for a tripod and why?
A tripod is useful in situations where you want to take pictures of fast action and stationary subjects. Examples include:
-
Sports
-
People
-
Landscapes
-
Close-ups
-
Macro shots
Try this test to find out if you really need a tripod. Take your camera and hold it still. Then, look through the scope. A tripod is necessary if you notice blurred lines or movement.
If you don't see any blurring, you probably won't notice any improvement by adding a tripod.
These are just a few tips to help you decide whether or not to purchase a tripod.
-
Smooth legs are important for tripods. This will prevent unwanted vibrations from shaking your lens.
-
A tripod is a good choice. Some tripods may be made from plastic, which can make them less durable. Consider a tripod made of metal.
-
A remote release is a great option. This allows you to control your camera remotely. Once you press the button, it will automatically fire the shutter.
-
Look for a tripod that has a 360-degree rotating head. This allows you to place your camera horizontally and vertically.
-
Keep in mind that tripods aren't cheap. Expect to pay $100-200. You'll still get a lot for your money.
-
Accessories such as memory cards and filters are important.
-
Before buying online, check with your local store. Many retailers offer free shipping.
-
You can read customer reviews to see what people think of a product.
-
Ask friends and family members who own similar products.
-
You can learn from customers' experiences by visiting message boards and forums.
-
You can search online for reviews from other users.
-
Use websites like Amazon.com to compare prices and read customer feedback.
-
Check out these photo galleries for an example of the work that photographers do with their tripods.
Light Room can be used to enhance your photographs.
The best way to ensure you have the perfect photos for your project is to start early. It's better to take as much as possible, then select the best.
Lightroom allows you to do this by letting you see how different settings affect each photo. You can also adjust these settings on-the-fly without going back into Photoshop. This allows you to quickly test what looks great and what does not.
Should I begin photography as a hobby.
Photography is an excellent way to capture memories and share them with friends and family. It allows you to discover more about the world.
You can find a lot of online resources that will teach you how to take better images.
It may be worth looking into classes at community colleges and art schools. This will allow you to network with other photographers who can give valuable feedback on your work.
Statistics
- By March 2014, about 3 million were purchased monthly, about 30 percent of the peak sales total. (en.wikipedia.org)
- There are people out there who will pick at flaws they can only see in 100% crops of your photos. (wikihow.com)
- In this case, 100% of readers who voted found the article helpful, earning it our reader-approved status. (wikihow.com)
- That's the easiest way to get blurry photos 100% of the time. (photographylife.com)
External Links
How To
How to take photographs in low lighting conditions
Low-light photography can be defined as taking photos in dimly lit and dark environments. This requires special equipment and techniques. The main challenges in this field include controlling exposure, whitebalance, and sharpness. There are two types of low light photography: flash and ambient. Flash photography is best when there is enough light. A flash is required if there isn’t enough light. A flash might be necessary if you are photographing a subject indoors and outside. Try shooting at night, during the moonlit hours, if you don't need a flash. This will allow you to get nice shadows and colors. Another option is taking photos at twilight. Twilight is when the sun sets but there's still daylight.
Also, you might want to try long exposures. Long exposures can be used to capture images even if the shutter has been closed for several minutes. The camera records only light that falls on it if the shutter is not closed. This light falls onto the sensor even after a long exposure. The shutter was not opened, so no new light entered the lens. The result is that there is very little movement. You can ensure clear images by turning off automatic settings such as autofocus or autoexposure. Adjust the ISO setting before you start to shoot. A 200 ISO setting gives you greater control over how dark or bright your image looks. When you're ready for the shot, press quickly the shutter button. This causes the shutter to close completely. You should then hold down the shutter button for as long as possible. You can prevent any additional light entering your camera by holding the shutter button down. Once you take the shot, wait a while before you release the shutter. This allows the camera to process the image. You can view your photos while you wait on the camera. Once you are satisfied with the photos, save them onto your computer.