Photographers must be visible online. SEO is one way to do that. SEO, or Search Engine Optimization, is the process of upgrading or restructuring your website to make it more search engine friendly. SEO is critical to rank your photography website in Google. SEO is crucial if you want your website to be found online by potential clients.
Keyword research
Proper keyword research is essential for photographers. Keyword research will allow photographers to discover their buyer personas, and the level of keyword competition. The more difficult a keyword is to rank for, the more work it will require. It is also important to think like your target customers when writing content. Once you have a keyword list, it is time to submit your content to search engines.
Internal linking is a must when optimizing SEO for photographers. The best articles and posts that perform well should be linked to related ones. This will build a web within your site that keeps people reading.
Optimisation of Images
SEO for any photography website is a crucial part. This process is designed to optimize images for search engines so they rank high in search results. Images are essential for a photography website. Therefore, it is vital that images can be easily found by anyone searching on Google. This will allow you to enhance the user experience and boost your website's overall rank on the search engine.
Photographers need to consider how their images are compressed and sized. To optimize the image's size, they should compress and resize them. Wordpress plugins can automatically compress new images. A feature in the plugin allows you to compress older images automatically. Photographers should limit the number of pages optimized for one topic. They should also ensure that their SEO plugins are properly configured.
The quality of the website content
Your website's content is a key factor in photography SEO. It should have a good balance of text and images. A good rule of thumb for a page is 500 to 700 words. However, it is not advisable to overdo it. Your blog should be used to show off your photography and to keep it interesting for readers.
Your website should adapt to different screen sizes. Google is very keen on mobile-friendly websites. Your website must also load quickly. Many websites for photographers don't respond to mobile devices. This makes it crucial to ensure your website's responsiveness and ease of navigation.
Backlinks
Backlinks are an essential part of a link-building strategy for photographers who want to increase their online visibility. It is important to build as many backlinks with reputable websites as possible. Spammy websites will harm your SEO. A link to a reliable website can boost page-topage linking.
Photographers often use keywords that reflect their industry and their customers. While these are relevant terms, they don't necessarily reflect the types of keywords that customers are actually searching for. Additionally, search engines may not understand images as they relate to keywords. Photographers often include images on their websites. It is important to include descriptive text, captions, as well as alternate text.
The targeting of a particular geographic area
Targeting a specific geographical area can make a big difference for your photography business. This not only eliminates the risk of reaching the wrong customers but also allows you personalize your messages. Customized messages are much more persuasive than generic ones. Think about targeting specific geographic areas next time you write a blog.
Geo-targeting is a great way to increase your SEO results. You can boost your SEO rankings in the right places and compete with the leading search engines by using geo-targeting.
FAQ
How can I improve the quality of my photos on my phone
Amazing photos are possible with minimal equipment. You can take amazing photos with just a phone.
Just need to learn the basics of how to use it all.
There are many apps available for both Android and iOS devices that make it easy to edit and share your pictures.
These five tips will help you take better photos.
-
Set Up Your Camera App. Your camera application should be already installed on your device. You can download the camera app from Google Play and Apple's App store.
-
Use effects and filters. Effects and filters allow you to alter the appearance of your photos without needing to touch them.
-
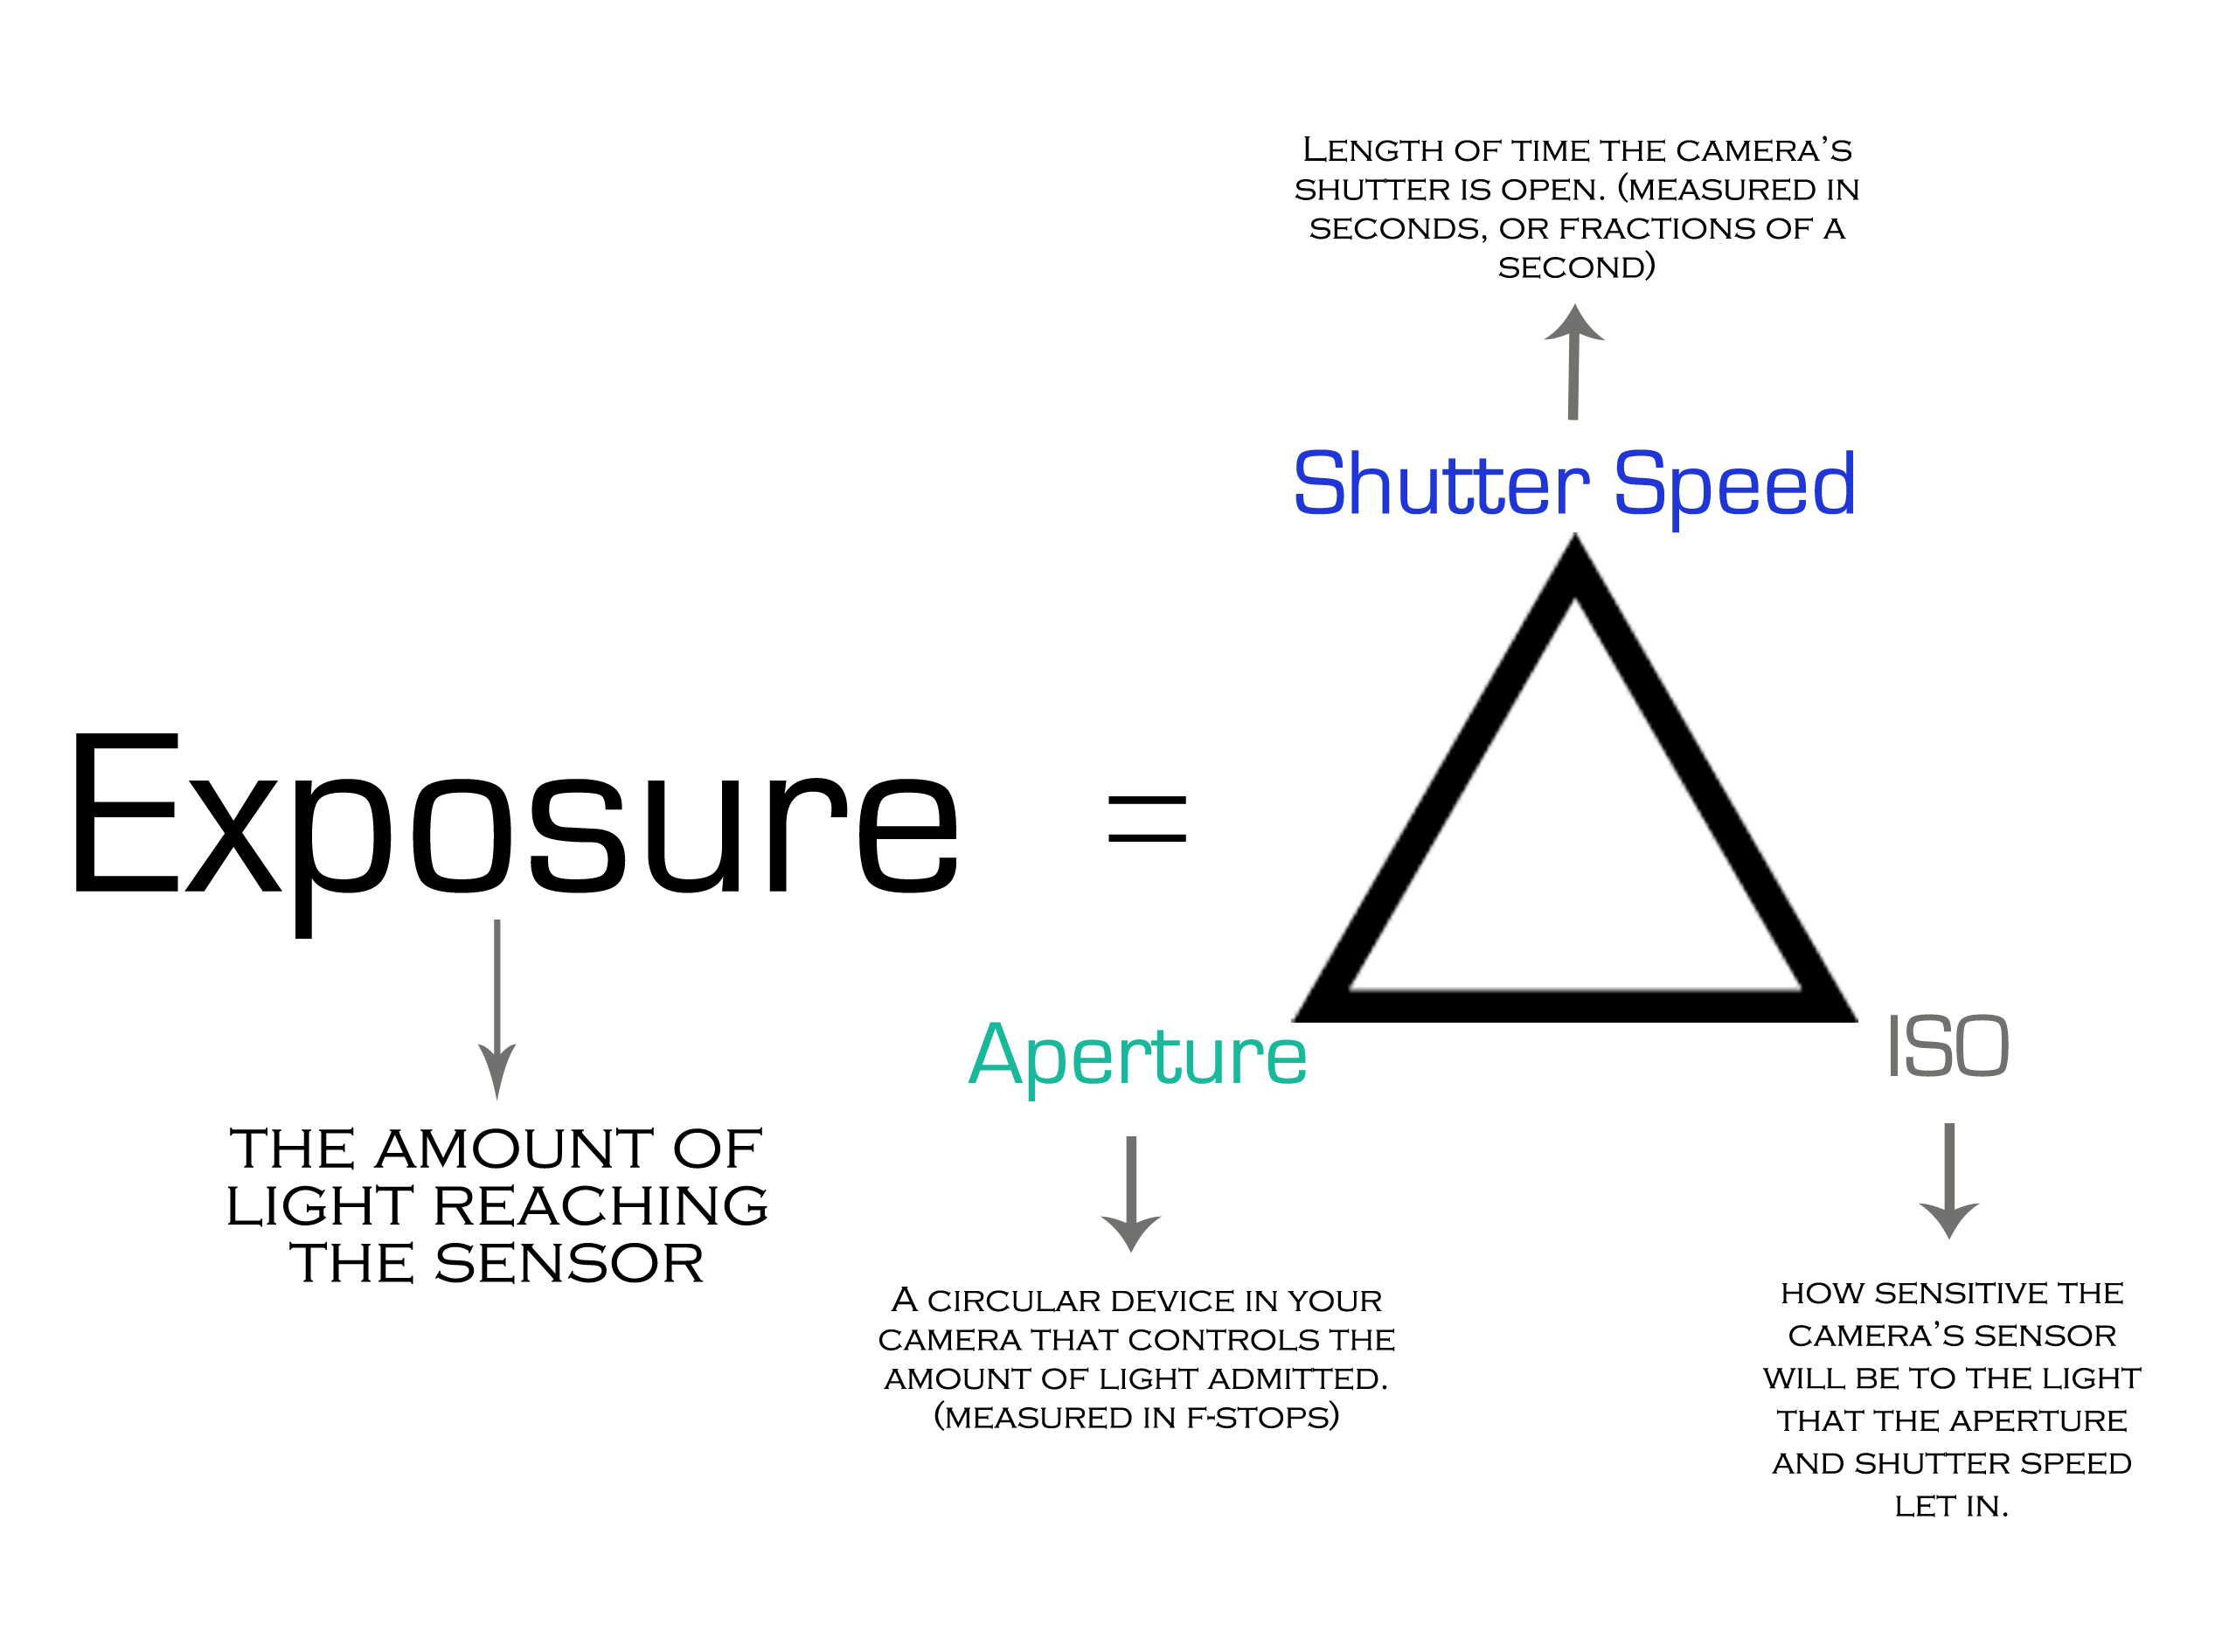
Adjust Exposure. Adjusting exposure helps you control the brightness of your picture.
-
Shoot In The Right Light. Shooting in bright light makes it easier to see details in your subject. Shooting in low light conditions lets you capture the shadows and highlights in your image.
-
Take Pictures Of People. Taking pictures of people shows others the things you love most.
Learn more about taking better photos with your smartphone by reading our article 5 Tips to Improve Your Photography Skills.
Light Room is an excellent tool to enhance your images.
It is important to begin early in order to have great photos. It is always better to take as many photos as you can and then choose the best.
This is possible because Lightroom lets you see how different settings affect each image. These settings can also be modified on-the-fly in Lightroom without ever having to open Photoshop again. This allows for quick experimentation with what looks good or not.
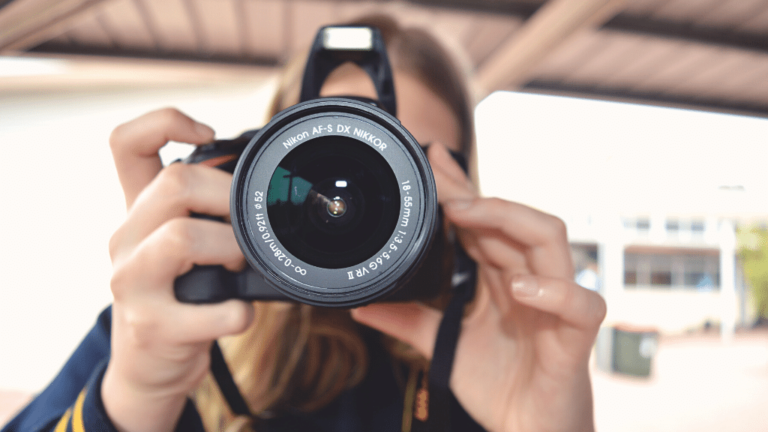
What camera is best for beginners and what are the pros and cons?
The best camera for beginners depends on your budget, needs, and skill level.
If you are looking to save money, then a point and shoot digital camera might be the best option. These cameras offer good quality but aren't very versatile.
The Digital Single Lens Reflex (Digital DSLR) camera allows you to interchange lenses, allowing you to take different kinds of photos. These lenses are usually more expensive than point-and shoots, but offer greater flexibility.
A beginner's package is a great way to get started in photography. Everything you need, including a flash, tripod, memory card and camera body, will be included in the one-pack.
Make sure to purchase extra batteries.
Statistics
- That's the easiest way to get blurry photos 100% of the time. (photographylife.com)
- The second easiest way to get blurry photos 100% of the time is to use a cheap filter on the front of your lens. (photographylife.com)
- Get 40% off Adobe Creative Cloud(opens in new tab) (creativebloq.com)
- There are people out there who will pick at flaws they can only see in 100% crops of your photos. (wikihow.com)
External Links
How To
How to take photos in low light conditions
Low-light photography is the art of taking photographs in dark or dimly lit environments. It requires special equipment. The main challenges are controlling exposure, white-balance, and sharpness. There are two types of low light photography: flash and ambient. Flash photography works best when there's enough light around. However, if there's not enough natural light around you, you'll need to use flash. Without a flash, it is possible to get a poor picture if the subject is indoors and not outdoors. You can also shoot at night when the moon is shining. You will get beautiful shadows and colors. Another option is taking photos at twilight. Twilight occurs when there is still daylight but the sun has set.
Also, you might want to try long exposures. Long exposures let you capture images even after the shutter has been open several minutes. The camera records only light that falls on it if the shutter is not closed. This light will continue to fall onto your sensor after a long exposure. But, the shutter remains closed and no new light enters. Therefore, there is very little movement. Turn off autofocus and autoexposure to ensure you get clear images. Make sure to adjust the ISO setting before starting to shoot. An ISO setting of 200 gives you more flexibility to control how bright or dark your image looks. Next, click quickly on the shutter button to capture the shot. This will cause the shutter to close completely. Keep the shutter button pressed down until the last second. By holding down the shutter button, you prevent additional light from entering the camera. Once you have taken your picture, wait for a few moments before you release that shutter button. This allows the camera time to process the photo. You can view your photos while you wait on the camera. Once you are satisfied, save them on your computer.