If you've ever wondered how to upload pictures to Shutterfly, you're not alone. The process of uploading pictures to Shutterfly can seem overwhelming. It is necessary to be familiarized with the file types that Shutterfly accepts in order to get started. If you have photos in a different format, you will need to first convert them. It doesn't matter what personal preference you may have, there are several simple ways to do it.
Upload images to a new album
If you'd like to create a new album for your uploaded pictures on Shutterfly, you can do so from the "Edit albums" page. The thumbnails for the photos will be displayed when you click the "Add Photo" link at its top. Select the photos to be moved, and then click "Create an album." Once you've made your choice, click "Next."
You will need to go to the "Add Pictures page" on the website in order to create a new album to store uploaded pictures. Next, click on "Add to Album". Next, choose either a new or existing album. You can also move pictures in an album based on their order. You can also edit the order in which your photos are placed by clicking on each photo.

Connect Google Photo
Sign in to your Shutterfly Account to connect Google Photos. Click on "Upload", then select "My Photos" and "Projects" for your photos to be imported. After uploading your photos, you can either print an order or create a project. After this process is completed, your Shutterfly content will be available for you to view and save. Use the links below for Google Photos integration with shutterfly
After you've set up your account go to the Upload Photo page to view the status. If your device is experiencing any issues or errors, restart it and wait for it to get fixed. Google will release an updated version within a few business days. It should now work properly after you have updated the app. Follow the steps below if it doesn't. This article will explain how to link Google Photos to shutterfly.
Connect Facebook
Shutterfly allows you to connect to your Facebook account and upload photos. To connect Facebook, log into your Facebook account and click the "Connect Facebook" button on the Shutterfly website. After you're done, you will see a link to your uploaded picture on the Shutterfly web site. The picture will automatically appear in your Shutterfly album once they click the link.
Now, you can connect your Facebook account to Shutterfly to print your pictures. After you've signed up, you can navigate to Shutterfly by clicking on the "Edit". After that, select "Add Pictures" and choose the area from which you want to pull pictures. Once this is done, you can start adding pictures. It is possible to connect your account to other sites.
Connect Instagram
You probably want to know how to upload images from Instagram to Shutterfly. The good news is that the process is simple, and the Shutterfly website offers several options for uploading pictures from your Instagram account. Shutterfly is free to register for. Then you can access your Instagram photos, and prepare for your first upload.
Open Shutterfly. Sign in using your Instagram account. You can upload photos from either your computer, mobile device or Facebook album. You can also select multiple photos that you wish to upload at the same time. When you are ready to upload, choose whether to add them to an existing album or create a new one. Photos can also be uploaded to Walgreens in your area for printing.
FAQ
What can I do to learn photography?
There are many different ways to learn how take great photos. You have the option to buy a book and attend classes, join an on-line community, or watch YouTube tutorials. There's no better way to learn the art of photography than by doing it yourself. This way you can control what goes into each photograph. And you'll continue to improve as long you keep learning.
Digital photography doesn't require expensive equipment. All you require is an internet-enabled computer and a good camera. All else is up to you.
Here are some tips to get your feet wet:
-
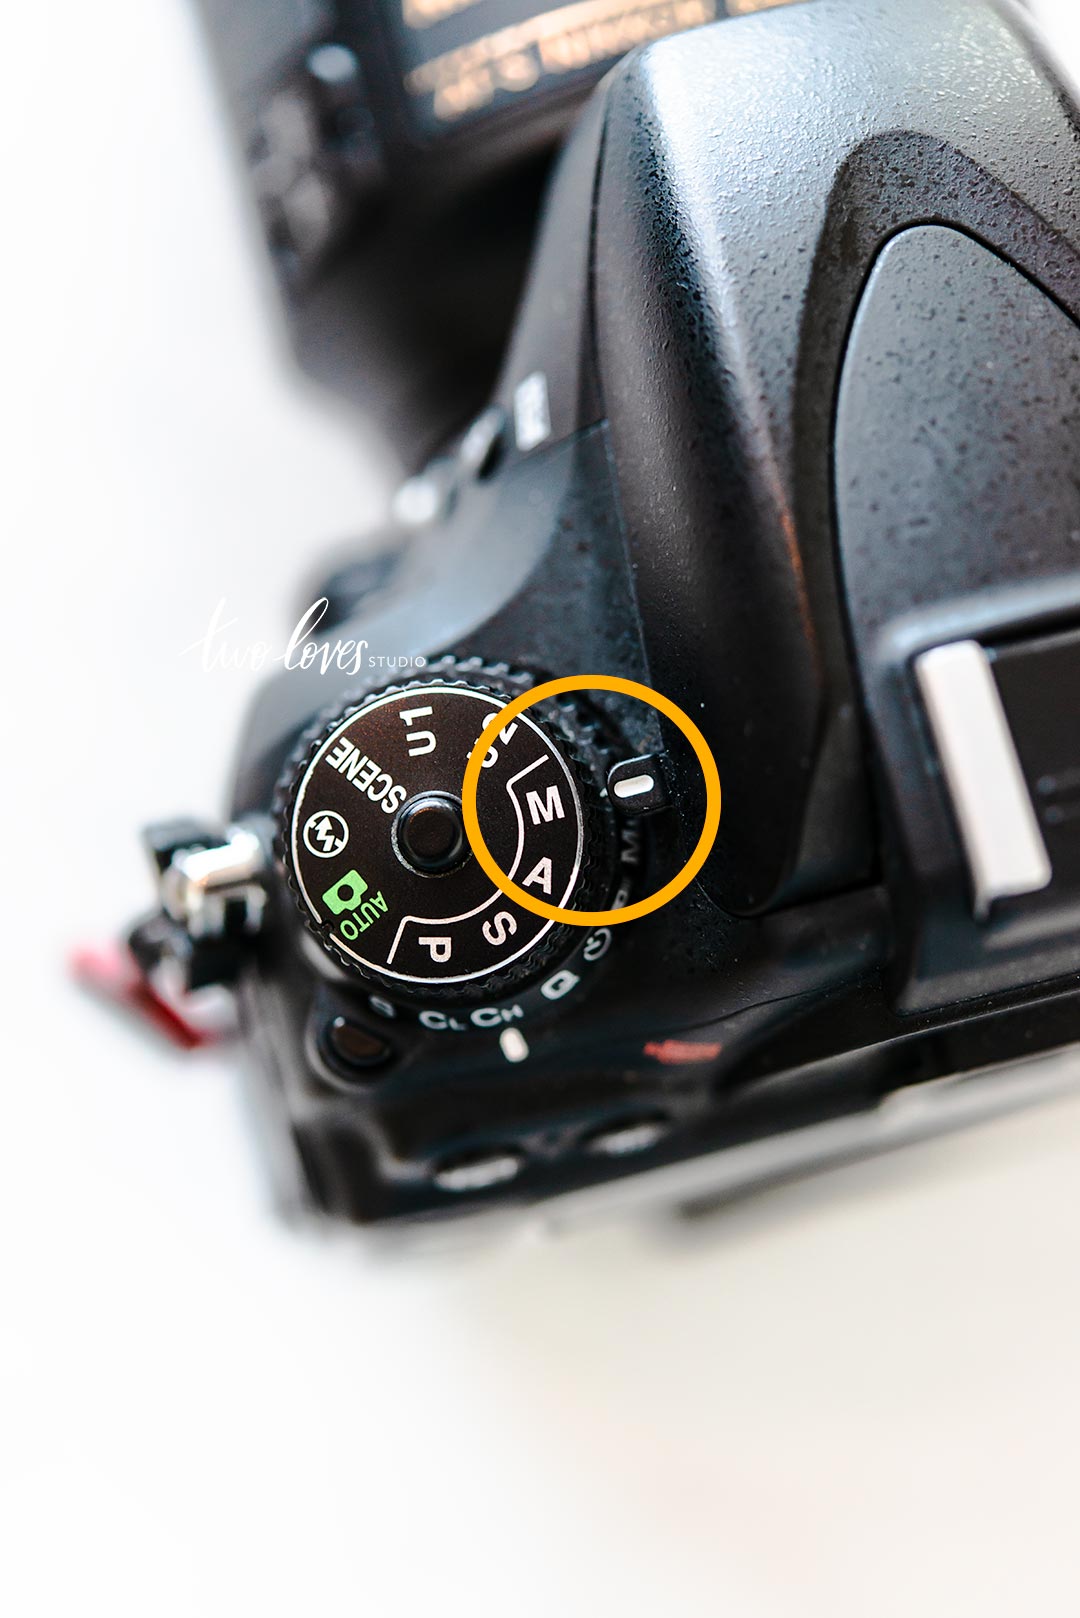
Get familiar with your camera's manual settings.
-
Learn how to use the controls.
-
Take lots of photographs.
-
Edit them.
-
Share them.
-
Keep practicing.
-
Experiment.
-
Take a look at the world from different perspectives.
-
Use light sources creatively.
-
Practice makes perfect.
-
Don't be afraid to fail.
-
Be patient.
-
Have fun
Do I Need A Tripod?
This is one question that everyone wants to know. While a tripod isn’t necessary every time, it is useful.
This allows you to keep your camera steady even when taking slow shutter speeds. A tripod is a great option for landscapes and other stationary subjects.
However, tripods can blur the images of moving subjects like sports and people. So, how do you know which situations require a tripod?
A tripod is useful for any situation where you want to photograph fast action or stationary subjects. Examples include:
-
Sports
-
People
-
Landscapes
-
Close-ups
-
Macro shots
Do this test to see if you are unsure if you require a tripod. You can hold your camera still while you look through the lens. You will need a tripod if you see blurred lines and movement.
If you don't see any blurring, you probably won't notice any improvement by adding a tripod.
If you do decide on a tripod purchase, these are some things to remember.
-
Your tripod should have smooth legs. This helps prevent vibrations that could shake your camera.
-
Choose a sturdy tripod. Some tripods are made of plastic, so they may not be as durable. You should opt for a steel tripod.
-
Consider purchasing a remote release. This lets you control your camera remotely. It can automatically fire the shutter when you press the button.
-
You should look for a tripod with 360 degree rotation. It makes it easy to position your camera horizontally or vertically.
-
You should keep in mind that tripods don't come cheap. Expect to spend between $100 and $200. You will still get a lot out of your money.
-
Accessories like memory cards and filters should not be forgotten.
-
Check your local stores before buying online. Many retailers offer free shipping.
-
Read reviews to determine what customers think about a particular product.
-
Ask your family members and friends to recommend similar products.
-
For customer feedback, visit message boards and forums.
-
Find user reviews online.
-
Amazon.com is a website that allows you to compare prices and get customer feedback.
-
Check out these photo galleries for an example of the work that photographers do with their tripods.
What camera is the best for beginners, and why?
The best camera for beginners depends on your budget, needs, and skill level.
For instance, you could choose a point & shoot digital camera if your goal is to save some money. These cameras can be very versatile, but they offer excellent quality.
A DSLR (Digital Single Lens Reflex) camera has interchangeable lenses that let you shoot different types of shots. While they are more expensive than point and shoots, they offer much more flexibility.
For beginners to photography, the beginner's set is a great place for you to start. You'll find everything you need in one package, including a camera body, lens, memory card, tripod, and flash.
Also, don't forget about extra batteries!
Statistics
- By March 2014, about 3 million were purchased monthly, about 30 percent of the peak sales total. (en.wikipedia.org)
- Get 40% off Adobe Creative Cloud(opens in new tab) (creativebloq.com)
- While I cannot prove that all of those spots were not sensor dust, the photo was taken during a heavy snowstorm…so I guess that 99.8% of the spots are snowflakes. (bhphotovideo.com)
- In this case, 100% of readers who voted found the article helpful, earning it our reader-approved status. (wikihow.com)
External Links
How To
How to take macro shots in photography
Macro photography can be defined as the ability of taking pictures at close range of small objects, such insects or flowers. Macro comes from the Greek makros (makros) which means large. If your lens has a focal distance greater than 50mm you can photograph objects that are extremely close up.
A macro lens with a good working distance should be able to capture sharp images even when you are not moving too much. Avoid movement when taking photos, as any movement during exposure can blur your image.
Here are some great tips to create stunning macro photographs.
-
Use a tripod. Set up a table or chair so you don’t knock anything over. This will ensure that you have less movement while shooting.
-
Select the right lighting. You can get a macro lens with built-in lights filters. However, if you don’t have one, you can purchase one. It helps to prevent overexposure.
-
Be patient! Shooting macros takes practice. Sometimes you might only be able see a very small insect or flower. However, it's worthwhile to keep shooting until it appears.
-
Shoot in RAW format. RAW files are more detailed than standard JPEGs and contain more data. RAW files allow you to make changes such as cropping, color correction and other adjustments later.
-
The background is important. Sometimes the background can add interest to your shot, even if you have a great foreground object. Make sure to include it in the photo.
-
Keep learning.